A Contract Wallet is ideal for "package pricing" where the client pre-pays for services. This pre-paid amount is then used to pay invoices as the services are delivered.
How to enable Contract Wallets?
Before enabling a Contract Wallet, ensure that you have an active contract set up for the client. If you need help creating a contract, please refer to our Creating contracts article.
Steps to Enable Contract Wallet Card:
Select the client to open their profile. Navigate to the Finances tab and choose the contract for which you want to enable the wallet.

Click the Edit button to make changes to the contract.

Under the Funding Preferences section, toggle on the option to enable wallet support. Click Save to apply your changes.

After saving, you can view the wallet card under the Wallet Cards section, which is also found in the Finances tab.

Exploring the Contract Wallet Card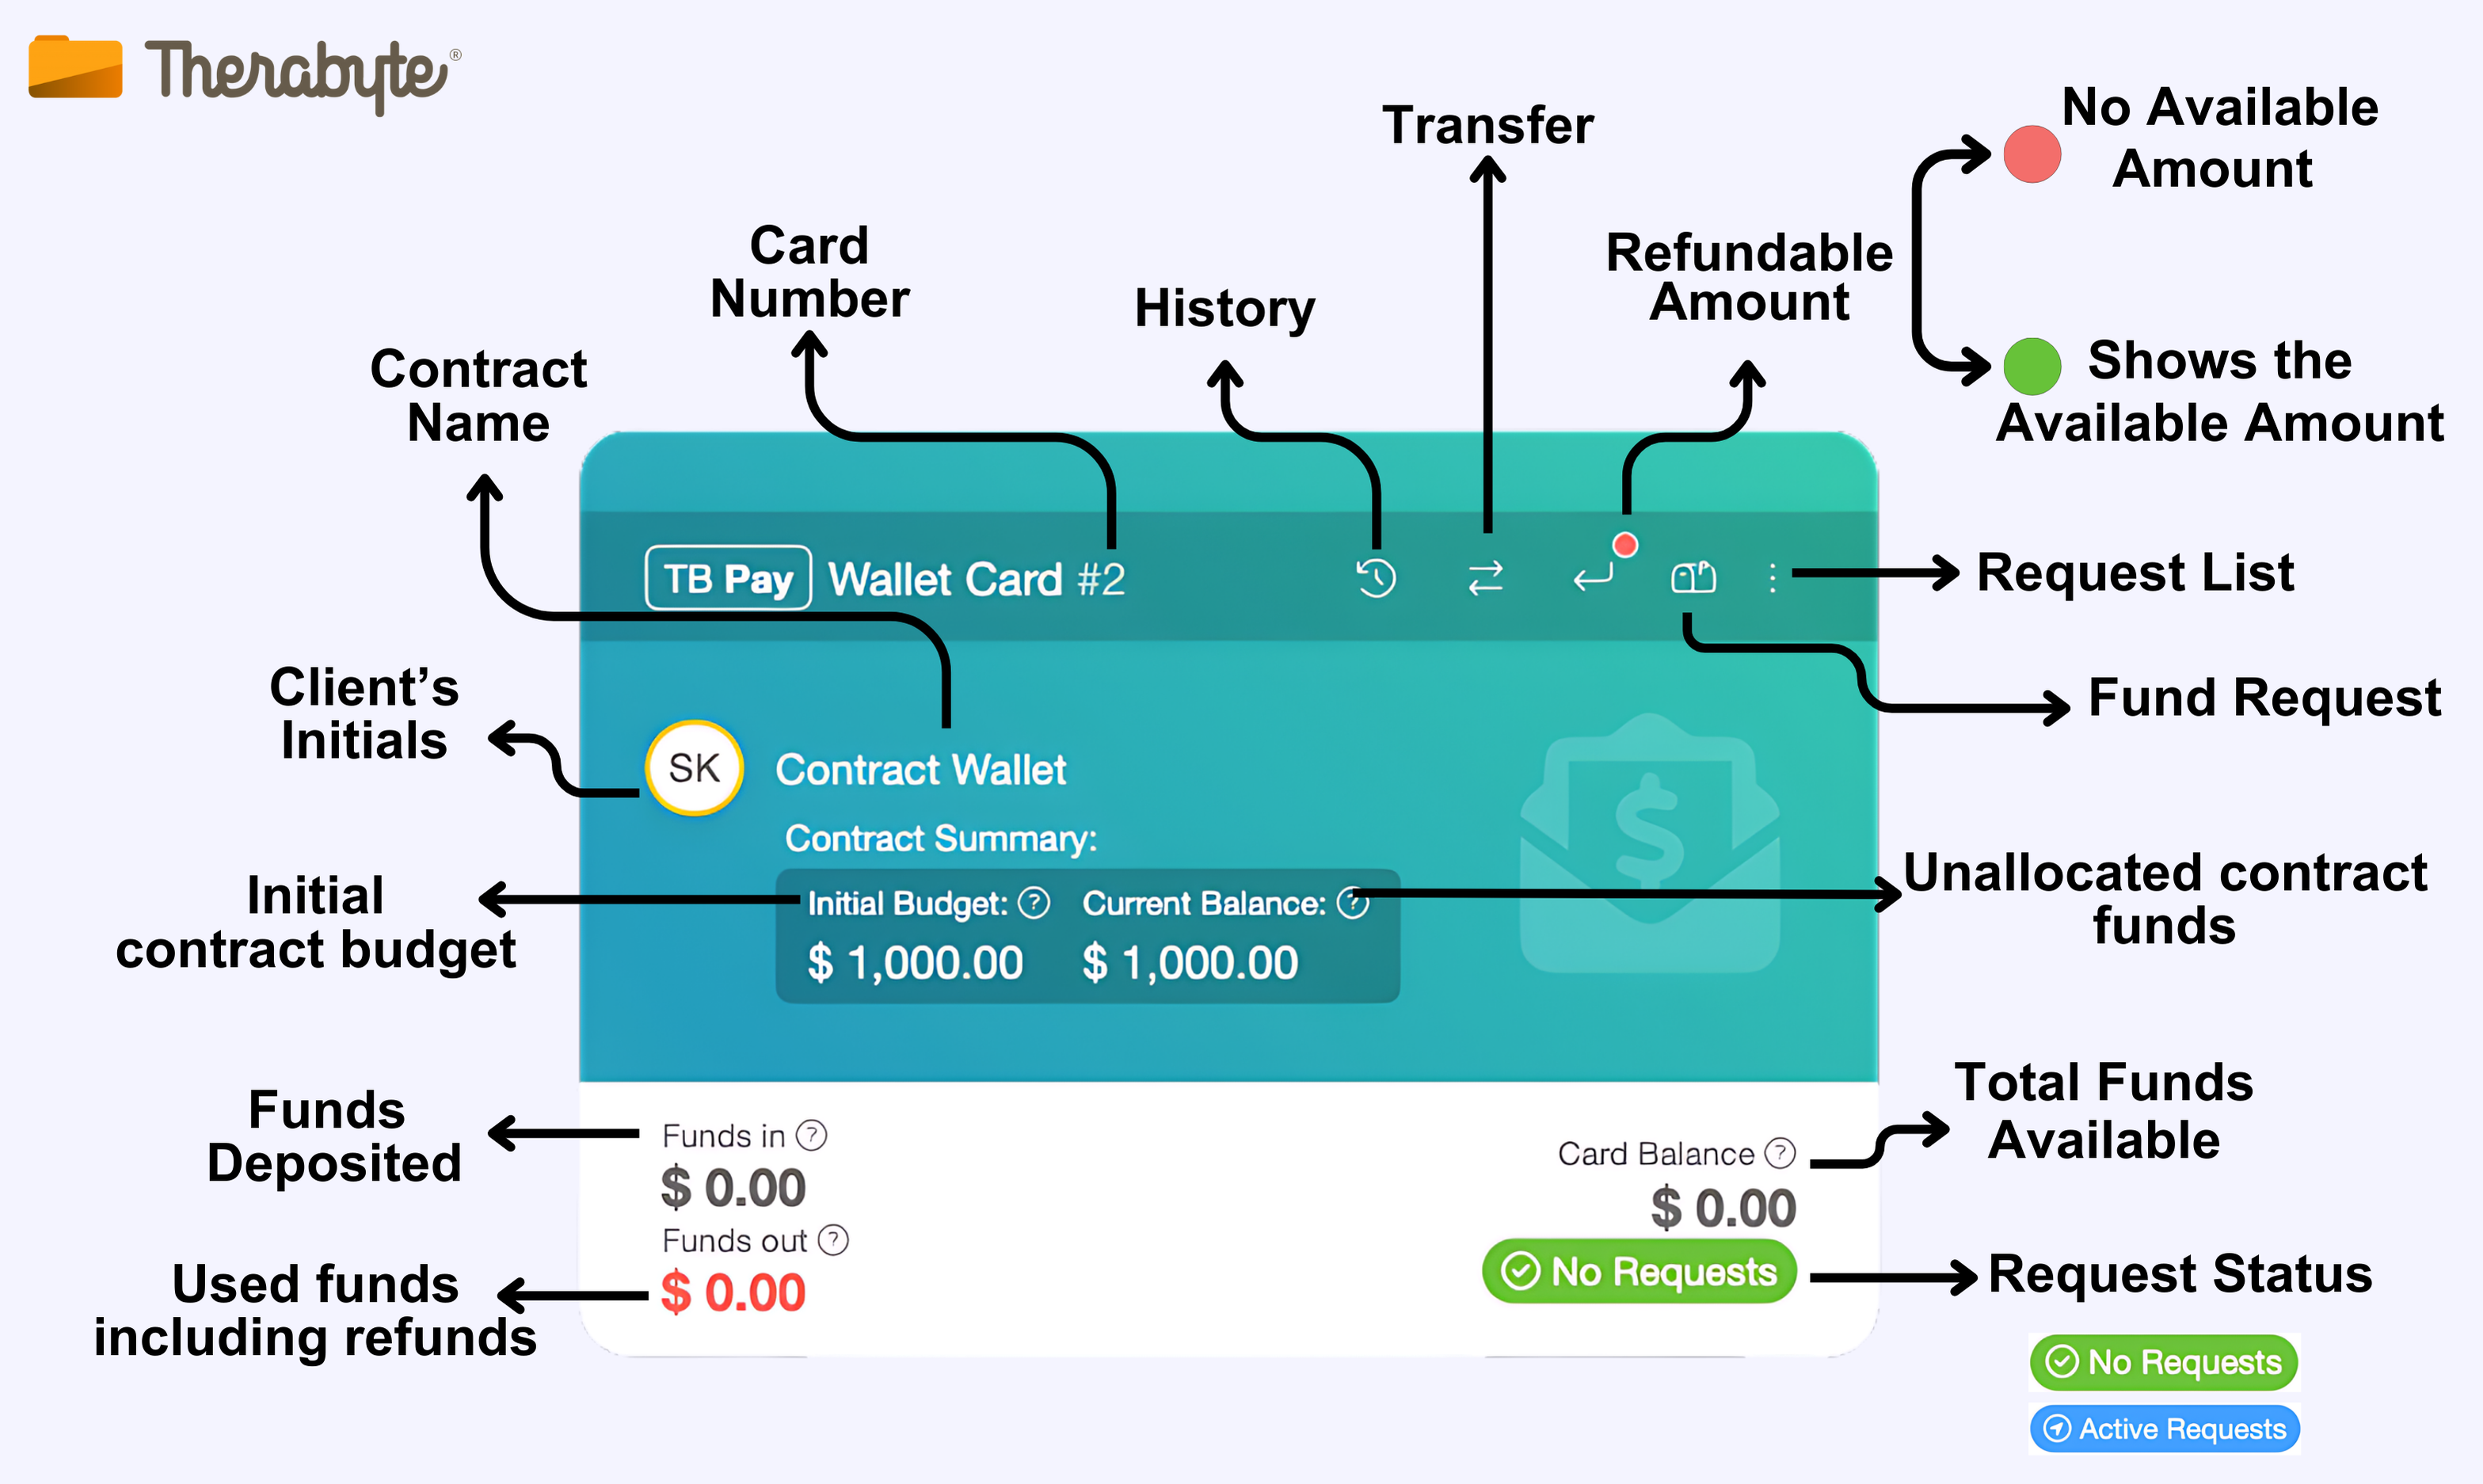
How Contract Wallets Work
- To learn how to request funds, please check our article on Creating a Wallet Fund Request
Using the Contract Wallet Card to Pay an Invoice:
Note: To use the contract wallet card, the bill-to should be the contract.
- Once the billing recipient has been updated and the invoice has been set to Submitted, open the invoice and click Pay.

- From the list of payment methods, click Wallet Card.

- Choose the appropriate Wallet Card and then click Confirm.

- The invoice will then be marked as paid, and the card balance will be reduced accordingly.

The Contract Wallet feature is available by request. If you’d like to explore how this feature can benefit your practice, please reach out to us at support@therabyte.com. We’re here to help you get set up!